inajmi
Member
- Downloaded
- 21.6 GB
- Uploaded
- 71.2 GB
- Ratio
- 3.29
- Seedbonus
- 5,495
- Upload Count
- 0 (0)
Member for 9 years
Creating a Virtual Machine in Windows Hyper-V. Configuring Virtual Disk, Virtual Switch, Integration Services and other Components
Source: Firewall.cx
Our previous articles covered basic concepts of Virtualization along with the installation and monitoring of Windows 2012 Hyper-V. This article takes the next step, which is the installation of a guest host (Windows 8.1) on our Windows 2012 Hyper-V enabled server. The aim of this article is to show how easily a guest operating system can be installed and configured, while explaining the installation and setup process.
Steps to Create a Virtual Machine in Hyper-V
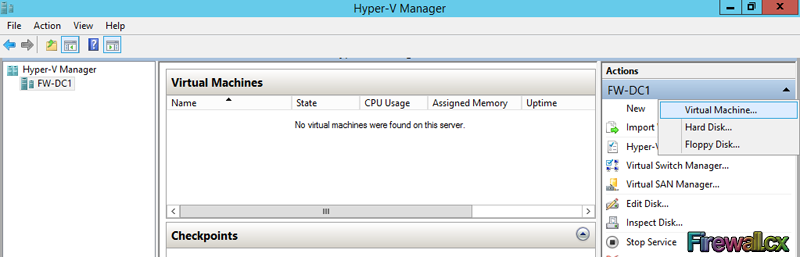
To begin the creation of our first virtual machine, open the Hyper-V manager in Windows Server 2012. On the Actions pane located on the right side of the window, click New and select Virtual Machine:
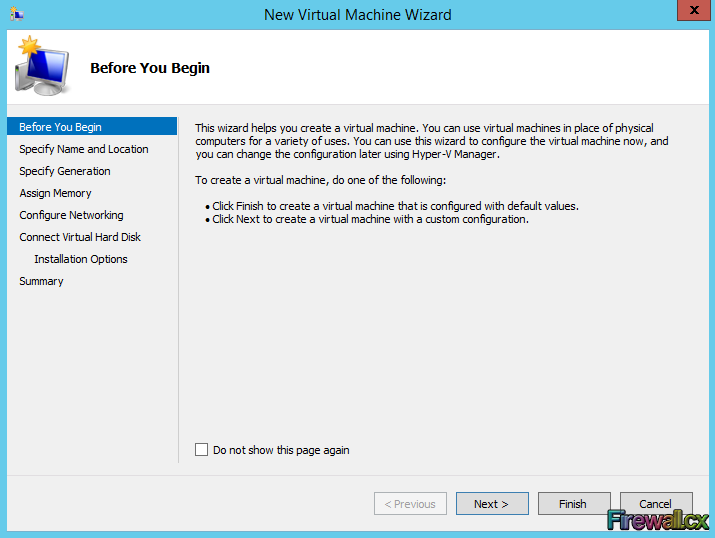
Read the Before you begin page which contains important information and then click Next:
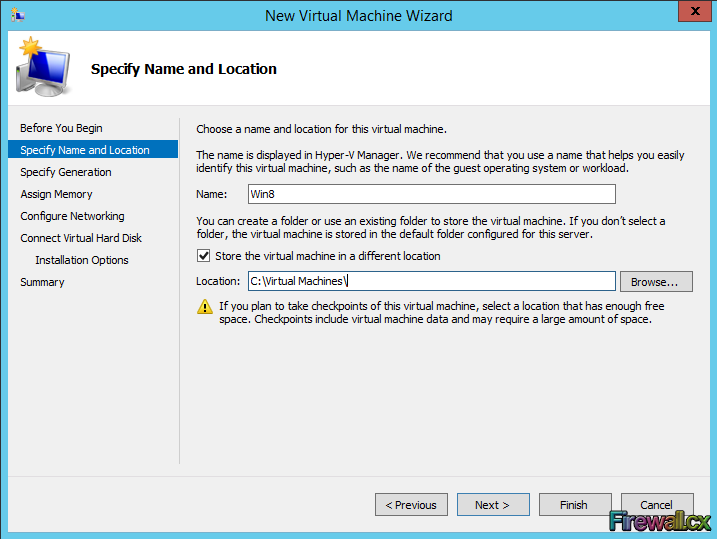
Type name of the virtual machine and configure the location to store virtual hard disk of this virtual machine. On server systems with shared storage devices, the virtual hard disk is best stored on the shared storage for performance and redundancy reasons, otherwise select a local hard disk drive. For the purpose of this lab, we will be using the server’s local C Drive:
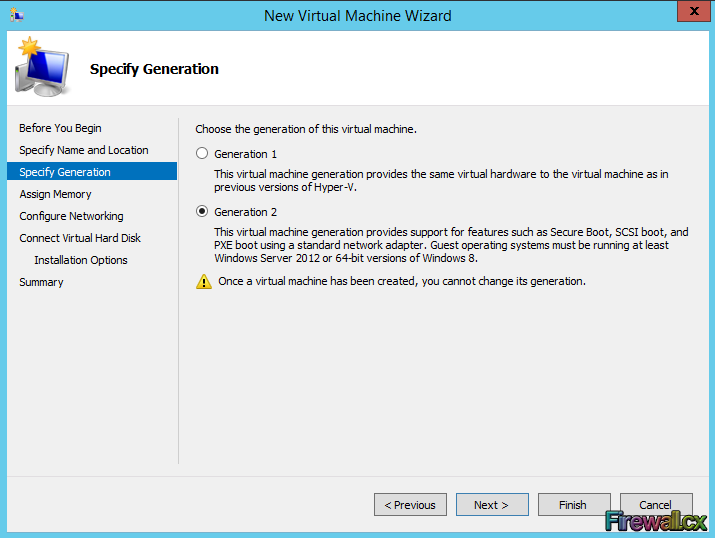
Choose the generation of virtual machine and click Next. Generation 2 is new with Server 2012 R2. If the guest operating system will be running Windows Server 2012 or 64bit Windows 8, 8.1, select Generation 2, otherwise select Generation 1:
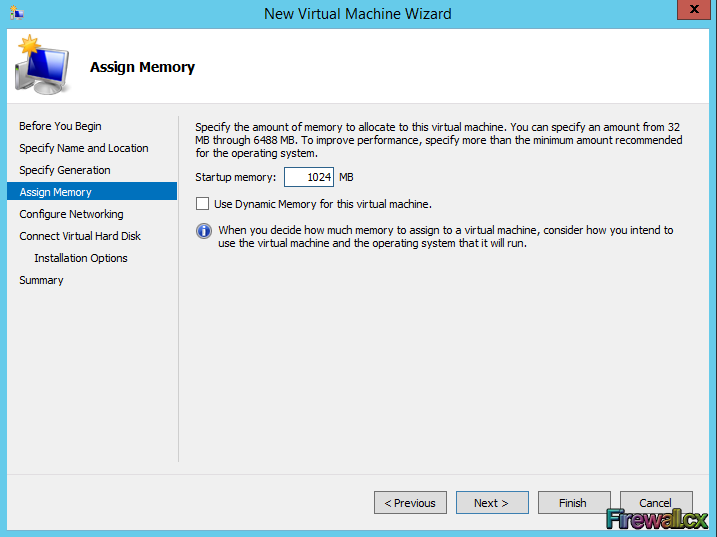
Next step involves assigning the amount of necessary memory. Under Assign Memory configure the memory and click Next. For the purpose of this lab, we will give our Windows 8.1 guest operating system 1 GB memory:
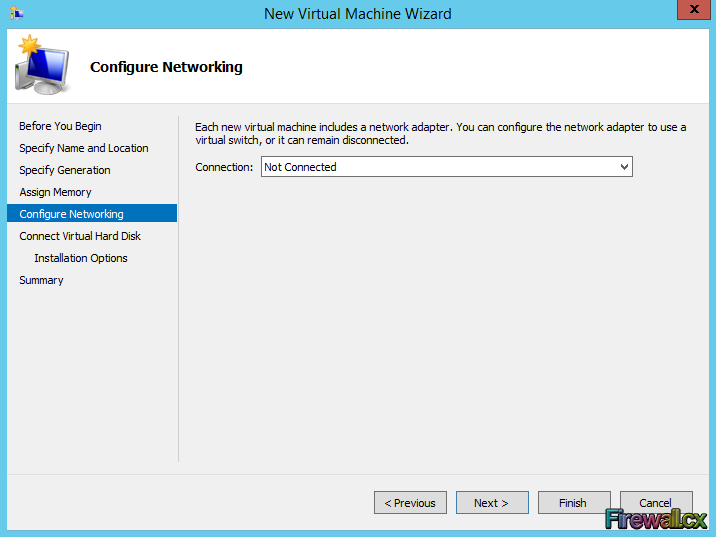
Under configure networking tab, leave the default setting and click Next. You can create virtual switches later and re-configure the virtual machine settings as required:
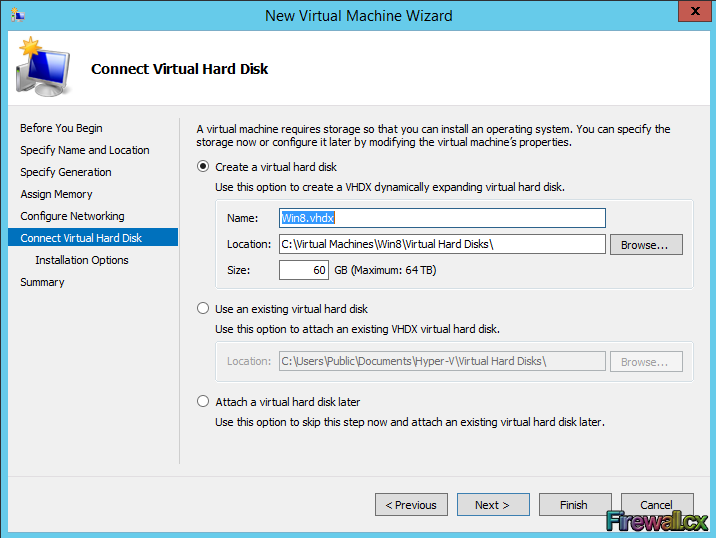
Next, choose to create a virtual hard disk and specify the size. We allocated a 60 GB disk size for our Windows 8.1 installation. When ready, click Next:
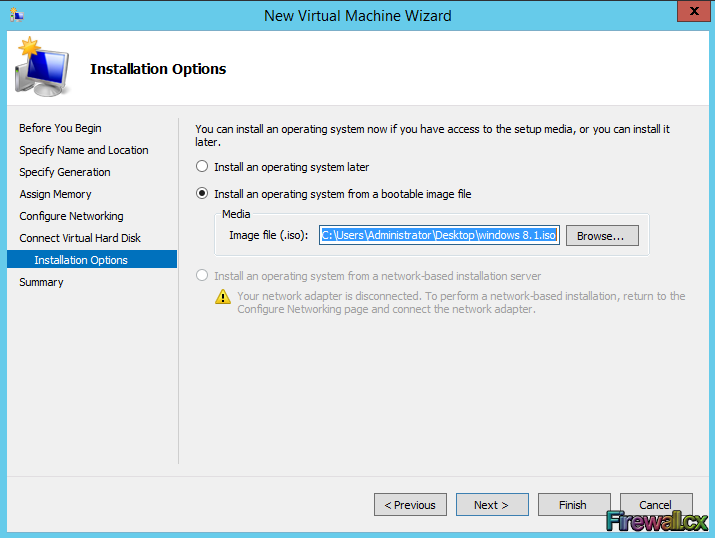
One of the great benefits with virtual machines is that we can proceed with the installation of the new operating system using and ISO image, rather than a CD/DVD.
Browse to the selected ISO image and click the Next button. The virtual machine will try to boot from the selected ISO disk when it starts, so it is important to ensure the ISO image is bootable:
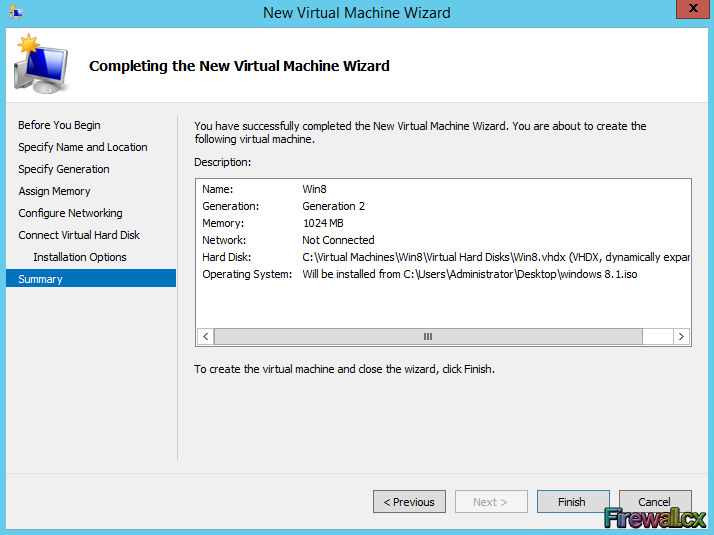
The last step allows us to review the virtual machine’s configuration summary. When ready click the Finish button:
Install Windows 8.1 Guest Operating System in Hyper-V Virtual machine
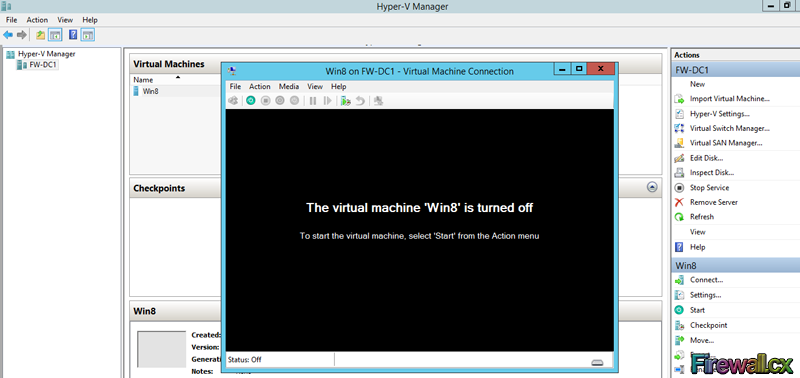
With the configuration of our virtual machine complete, it’s time to power on our virtual machine and install the operating system. Open Hyper-V Manager, and under the Virtual Machines section double-click the virtual machine created earlier. Click on the start button from the Action Menu to power on the virtual machine:
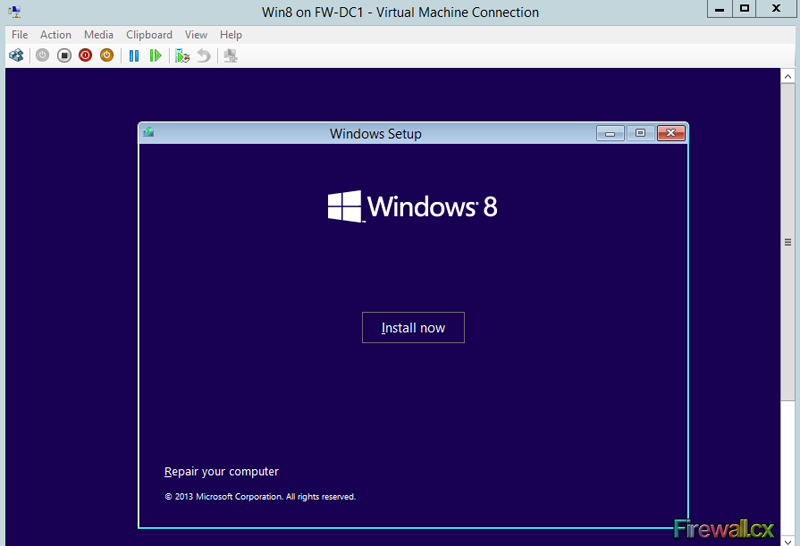
After the virtual machine completes its startup process, press any key to boot from the Windows 8.1 disk (ISO media) we configured previously. The Windows 8 installation screen will appear in a couple of seconds. Click Next followed by the Install Now button to begin the installation of Windows operating system on the virtual machine:
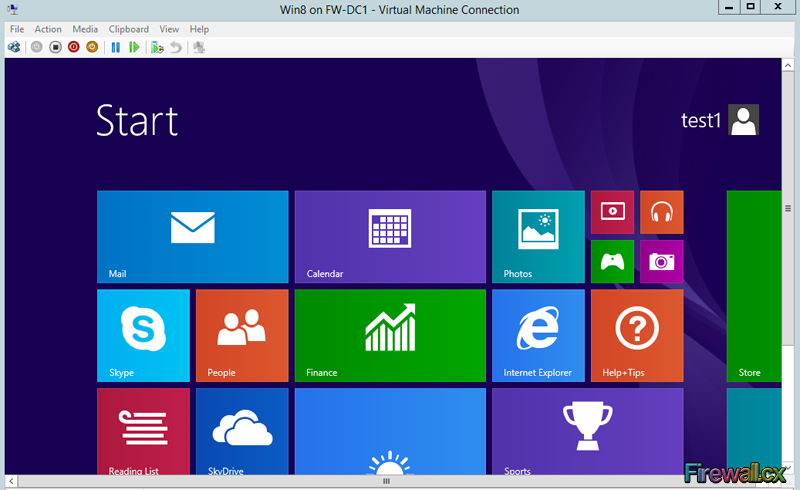
After accepting the End User License Agreement (EULA) we can continue our post-installation setup by configuring the hard disk. Windows will then begin its installation and update the screen as it progresses. Finally, once the installation is complete, we are presented with the Personalization screen and finally, the Start Screen:
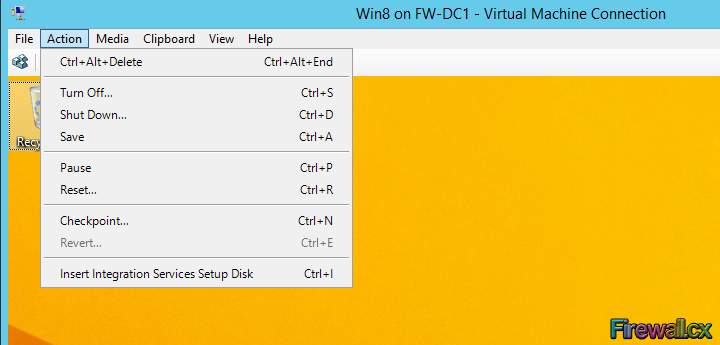
After the operating system installation and configuration is complete, it is important to proceed with the installation of Integration Services.
Integration Services on Hyper-V is what VM Tools is for VMware. Integration Services will help significantly enhance the VM’s guest operating system performance, allow file copy from the host machine to the guest machine easily, time synchronization between host and guest machines, improve management of the VM by replacing the generic operating system drivers for the mouse, keyboard, video card, network and SCSI controller components.
Other services offered by Integration Services are:
In the Upgrade Hyper-V Integration Services dialog box, click OK and when prompted, click Yes to restart the virtual machine. Using the Hyper-V Manager console, administrators can keep track of all VM's installed along side with their CPU Usage, Assigned memory and uptime:

This completes our article covering the installation of a Virtual Machine within Hyper-V and setup of Integration Services.
Source: Firewall.cx
Our previous articles covered basic concepts of Virtualization along with the installation and monitoring of Windows 2012 Hyper-V. This article takes the next step, which is the installation of a guest host (Windows 8.1) on our Windows 2012 Hyper-V enabled server. The aim of this article is to show how easily a guest operating system can be installed and configured, while explaining the installation and setup process.
Steps to Create a Virtual Machine in Hyper-V
To begin the creation of our first virtual machine, open the Hyper-V manager in Windows Server 2012. On the Actions pane located on the right side of the window, click New and select Virtual Machine:
Read the Before you begin page which contains important information and then click Next:
Type name of the virtual machine and configure the location to store virtual hard disk of this virtual machine. On server systems with shared storage devices, the virtual hard disk is best stored on the shared storage for performance and redundancy reasons, otherwise select a local hard disk drive. For the purpose of this lab, we will be using the server’s local C Drive:
Choose the generation of virtual machine and click Next. Generation 2 is new with Server 2012 R2. If the guest operating system will be running Windows Server 2012 or 64bit Windows 8, 8.1, select Generation 2, otherwise select Generation 1:
Next step involves assigning the amount of necessary memory. Under Assign Memory configure the memory and click Next. For the purpose of this lab, we will give our Windows 8.1 guest operating system 1 GB memory:
Under configure networking tab, leave the default setting and click Next. You can create virtual switches later and re-configure the virtual machine settings as required:
Next, choose to create a virtual hard disk and specify the size. We allocated a 60 GB disk size for our Windows 8.1 installation. When ready, click Next:
One of the great benefits with virtual machines is that we can proceed with the installation of the new operating system using and ISO image, rather than a CD/DVD.
Browse to the selected ISO image and click the Next button. The virtual machine will try to boot from the selected ISO disk when it starts, so it is important to ensure the ISO image is bootable:
The last step allows us to review the virtual machine’s configuration summary. When ready click the Finish button:
Install Windows 8.1 Guest Operating System in Hyper-V Virtual machine
With the configuration of our virtual machine complete, it’s time to power on our virtual machine and install the operating system. Open Hyper-V Manager, and under the Virtual Machines section double-click the virtual machine created earlier. Click on the start button from the Action Menu to power on the virtual machine:
After the virtual machine completes its startup process, press any key to boot from the Windows 8.1 disk (ISO media) we configured previously. The Windows 8 installation screen will appear in a couple of seconds. Click Next followed by the Install Now button to begin the installation of Windows operating system on the virtual machine:
After accepting the End User License Agreement (EULA) we can continue our post-installation setup by configuring the hard disk. Windows will then begin its installation and update the screen as it progresses. Finally, once the installation is complete, we are presented with the Personalization screen and finally, the Start Screen:
After the operating system installation and configuration is complete, it is important to proceed with the installation of Integration Services.
Integration Services on Hyper-V is what VM Tools is for VMware. Integration Services will help significantly enhance the VM’s guest operating system performance, allow file copy from the host machine to the guest machine easily, time synchronization between host and guest machines, improve management of the VM by replacing the generic operating system drivers for the mouse, keyboard, video card, network and SCSI controller components.
Other services offered by Integration Services are:
- Backup (Volume Snapshot)
- Virtual Machine Connection Enhancements
- Hyper-V Shutdown Service
- Data Exchange
In the Upgrade Hyper-V Integration Services dialog box, click OK and when prompted, click Yes to restart the virtual machine. Using the Hyper-V Manager console, administrators can keep track of all VM's installed along side with their CPU Usage, Assigned memory and uptime:
This completes our article covering the installation of a Virtual Machine within Hyper-V and setup of Integration Services.