- Downloaded
- 774.5 GB
- Uploaded
- 7.8 TB
- Ratio
- 10.32
- Seedbonus
- 7
- Upload Count
- 0 (0)
Member for 5 years
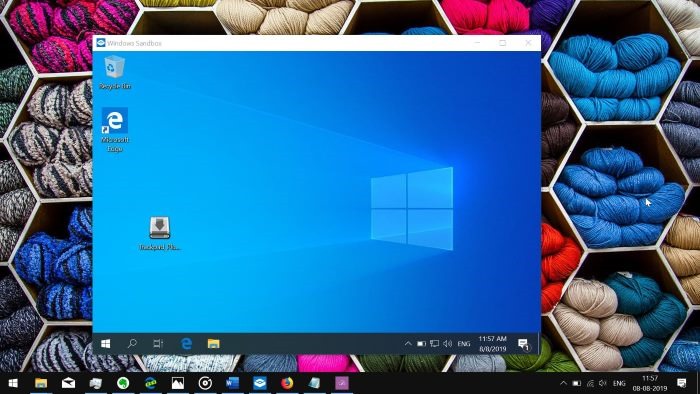
Windows Sandbox is probably the most useful security feature added to Windows 10 in the recent past. Based on the Hyper-V technology, the Windows Sandbox is an isolated environment designed to enable you to test suspicious or untrusted programs without affecting the host Windows 10 installation and data.
The Windows Sandbox is not turned on by default but can be enabled via the Windows Features dialog. The computer must support the virtualization technology, but then most computers support it. Although the Sandbox is not available in the Home edition, there is a workaround around to enable the same.
Each time you close the Sandbox, the environment is reset to the default by deleting downloaded items and changes to Windows 10 Sandbox, if any. In other words, each time you start the Sandbox, you get a clean Windows 10 installation.
As you might have observed by know, Windows 10 or the Windows Sandbox doesn’t let you configure or change the default settings of Windows Sandbox. That is, for instance, you cannot start the Windows Sandbox without networking.
Luckily, the Windows Sandbox now allows you to change some basic settings. You can now enable or disable the virtualized GPU, enable or disable the network access to the Sandbox, share folders between your host Windows 10 install and Sandbox, and use scripts to perform actions at the logon.
However, there is a catch. Sadly, these settings are not present in the Settings app. You will have to use a configuration file (.WSB file) to change the default settings of Windows Sandbox. The configuration file is fairly easy to use.
Use the configuration file to control Sandbox
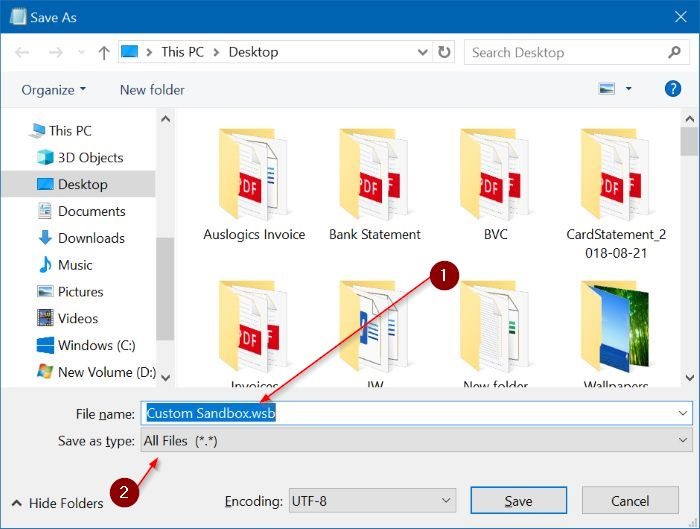
Step 1: Copy and paste the below mentioned configuration code in the Notepad, give it a name, add .wsb to the end of the file name, change Save as type to All files, and then click the Save button.
Step 2: Double-click on the .wsb file to launch the Sandbox with new settings.
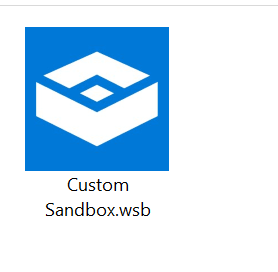
IMPORTANT: The new configuration will only be considered if you launch the Sandbox by double-clicking on the .wsb file that you have created. If you launch the Sandbox via the Start menu, Sandbox will be started with the default settings.
Configuration file keywords and values
To disable the vGPU
<VGpu>disable</VGpu>
To disable the networking
<Networking>disable</Networking>
Example:
The following code disables vGPU and networking in the Sandbox.
<Configuration>
<VGpu>Disable</VGpu>
<Networking>Disable</Networking>
</Configuration>
Logon command
<LogonCommand>
<Command>yourcommandhere</Command>
</LogonCommand>
Replace the “yourcommandhere” with the path to executable or script which you want to invoke at the logon.
To share folders
<MappedFolder>
<HostFolder>path to the host folder</HostFolder>
<ReadOnly>value</ReadOnly>
</MappedFolder>
The following is an example script shared by Microsoft.
<Configuration>
<VGpu>Disable</VGpu>
<Networking>Disable</Networking>
<MappedFolders>
<MappedFolder>
<HostFolder>C:\Users\Public\Downloads</HostFolder>
<ReadOnly>true</ReadOnly>
</MappedFolder>
</MappedFolders>
<LogonCommand>
<Command>explorer.exe C:\users\WDAGUtilityAccount\Desktop\Downloads</Command>
</LogonCommand>
The Windows Sandbox is not turned on by default but can be enabled via the Windows Features dialog. The computer must support the virtualization technology, but then most computers support it. Although the Sandbox is not available in the Home edition, there is a workaround around to enable the same.
Each time you close the Sandbox, the environment is reset to the default by deleting downloaded items and changes to Windows 10 Sandbox, if any. In other words, each time you start the Sandbox, you get a clean Windows 10 installation.
As you might have observed by know, Windows 10 or the Windows Sandbox doesn’t let you configure or change the default settings of Windows Sandbox. That is, for instance, you cannot start the Windows Sandbox without networking.
Luckily, the Windows Sandbox now allows you to change some basic settings. You can now enable or disable the virtualized GPU, enable or disable the network access to the Sandbox, share folders between your host Windows 10 install and Sandbox, and use scripts to perform actions at the logon.
However, there is a catch. Sadly, these settings are not present in the Settings app. You will have to use a configuration file (.WSB file) to change the default settings of Windows Sandbox. The configuration file is fairly easy to use.
Use the configuration file to control Sandbox
Step 1: Copy and paste the below mentioned configuration code in the Notepad, give it a name, add .wsb to the end of the file name, change Save as type to All files, and then click the Save button.
Step 2: Double-click on the .wsb file to launch the Sandbox with new settings.
IMPORTANT: The new configuration will only be considered if you launch the Sandbox by double-clicking on the .wsb file that you have created. If you launch the Sandbox via the Start menu, Sandbox will be started with the default settings.
Configuration file keywords and values
To disable the vGPU
<VGpu>disable</VGpu>
To disable the networking
<Networking>disable</Networking>
Example:
The following code disables vGPU and networking in the Sandbox.
<Configuration>
<VGpu>Disable</VGpu>
<Networking>Disable</Networking>
</Configuration>
Logon command
<LogonCommand>
<Command>yourcommandhere</Command>
</LogonCommand>
Replace the “yourcommandhere” with the path to executable or script which you want to invoke at the logon.
To share folders
<MappedFolder>
<HostFolder>path to the host folder</HostFolder>
<ReadOnly>value</ReadOnly>
</MappedFolder>
The following is an example script shared by Microsoft.
<Configuration>
<VGpu>Disable</VGpu>
<Networking>Disable</Networking>
<MappedFolders>
<MappedFolder>
<HostFolder>C:\Users\Public\Downloads</HostFolder>
<ReadOnly>true</ReadOnly>
</MappedFolder>
</MappedFolders>
<LogonCommand>
<Command>explorer.exe C:\users\WDAGUtilityAccount\Desktop\Downloads</Command>
</LogonCommand>