- Downloaded
- 774.5 GB
- Uploaded
- 7.8 TB
- Ratio
- 10.32
- Seedbonus
- 7
- Upload Count
- 0 (0)
Member for 5 years
An image backup is probably the best and only way out there to back up your Windows 10 installation properly. This is the type of backup you need to go for if you want to back up the Windows 10 installation by including your favorite programs, apps, and settings.
Windows 10 has a built-in tool for the system image backup. Although the tool was not updated ever since it was introduced first with Windows 7 a decade ago, it’s part of Windows 10 and does its job very well. So, in this guide, we will see how to use the built-in image backup utility to create an image backup of Windows 10.
What is a system image backup? Well, in Microsoft’s own words, it’s a copy of drives required for Windows to run. It will include all partitions and files required to restore Windows 10.
Create Windows 10 system image backup
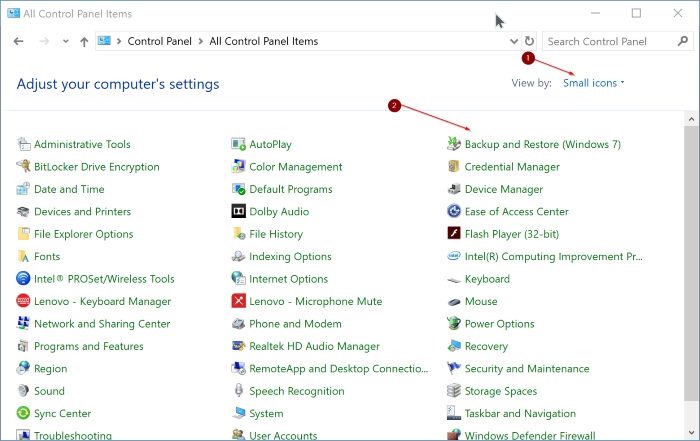
Step 1: Open the Control Panel. Change the View by to Small icons. Click on Backup and Restore (Windows 7). Yes, you need to click the Backup and Restore (Windows 7) option.
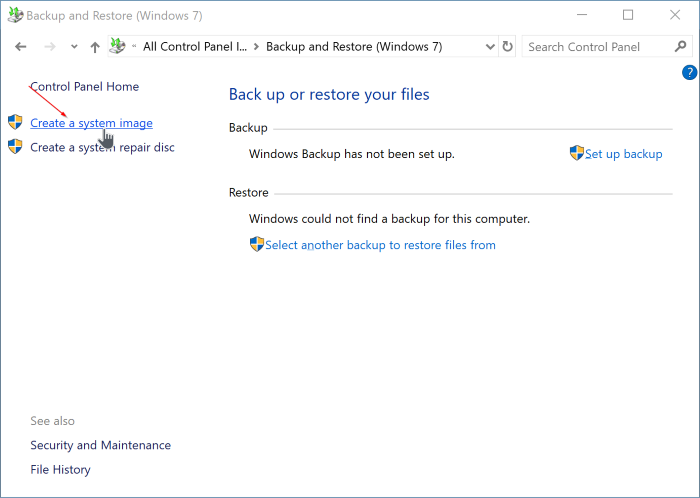
Step 2: On the left pane, click the Create a system image link to open the image backup wizard.
Step 3: Here, choose a location to save the system image backup. Remember that the tool won’t let you select a drive that is on the same physical disk that you are trying to back up. That is, the Windows 10 drive should not be on the same physical drive (HDD or SSD) that you are selecting to save the system image backup. If you have only one physical disk on your PC, connect a USB drive, and then select the same.
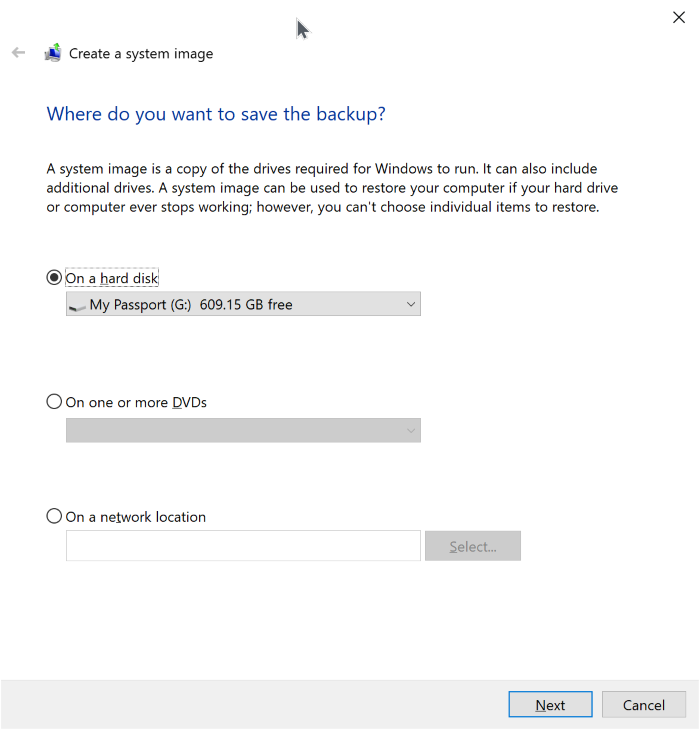
Make sure that your selected location has enough free space. The image backup will take about the current size of the Windows 10 install drive unless you want to include additional drives in the backup.
Click the Next button to continue.
Step 4: In this step, you need to select the drives that you would like to include in the image backup. Note that the tool automatically selects the drives that are required to run Windows 10 in the backup. So, you don’t need to worry about what drives to include in the backup. If you are creating a Windows 10 system image backup, no need to select additional drives other than the ones selected by default.
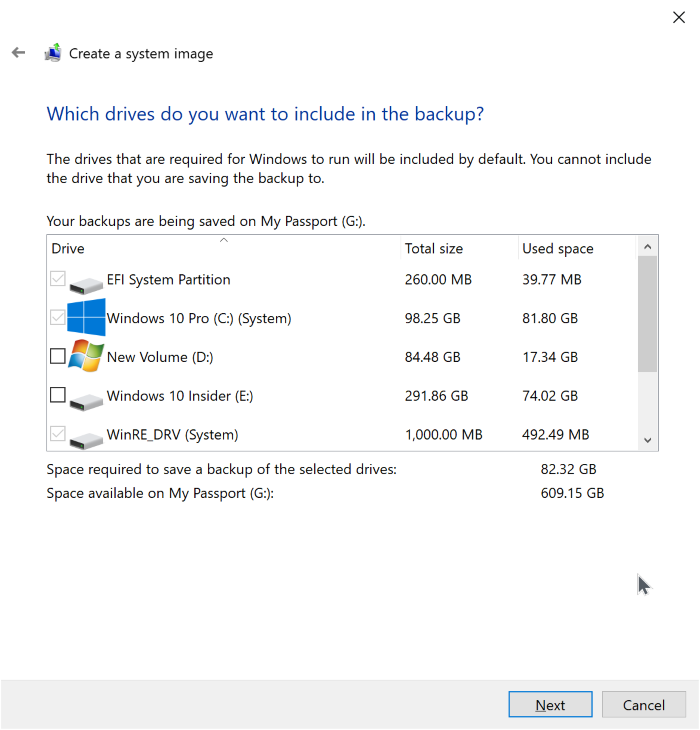
Here, the tool displays the amount of free space required to save the image backup of the selected drives. Make sure that the selected backup drive has the required amount of free space before proceeding further.
Click on the Next button.
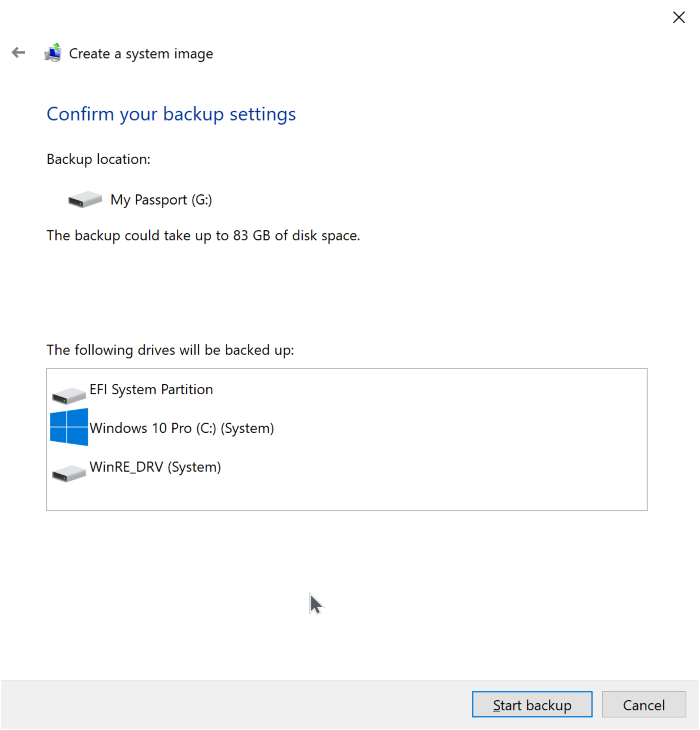
Step 5: Finally, you will get the confirmation screen where you can see the backup settings, including the drives included in the backup. Click the Start backup button to begin creating and transferring the Windows 10 system image backup to the selected location.
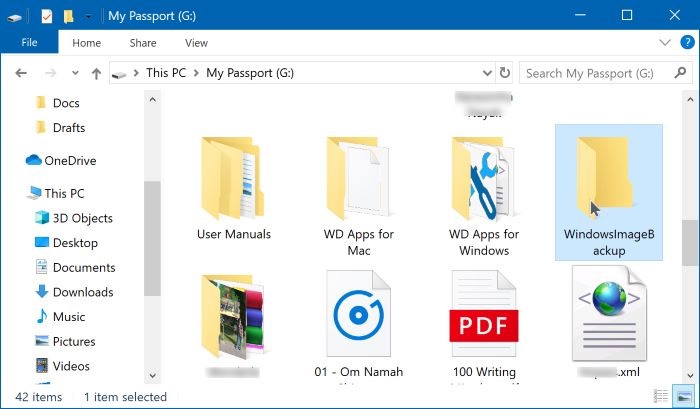
Windows 10 will create a folder called WindowsImageBackup at the root of the selected drive and save the image backup (VHDX) over there.
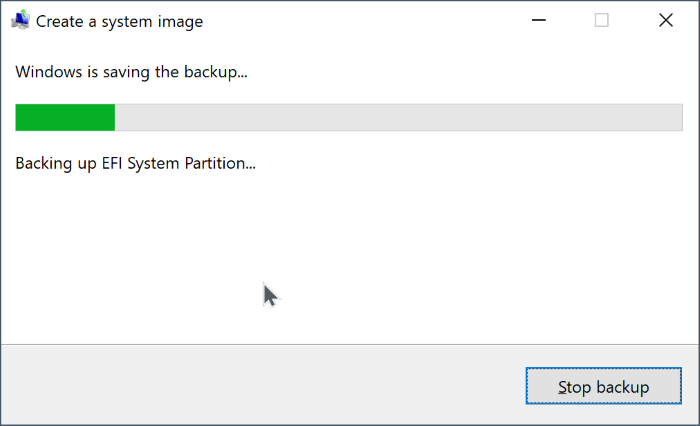
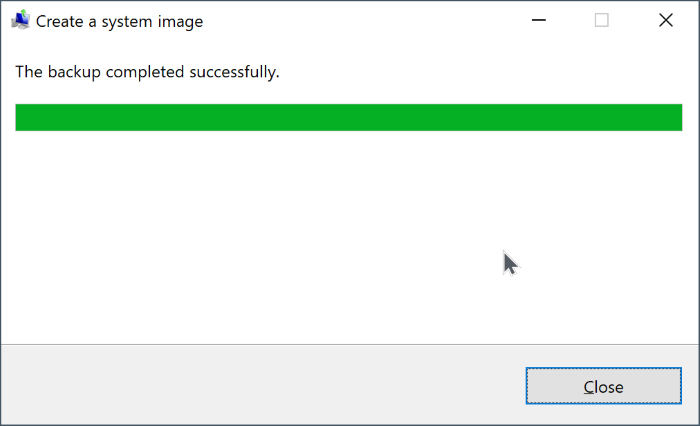
Depending on the size of the data, the process might take up to a few hours. Don’t turn off your computer until the image backup is ready.
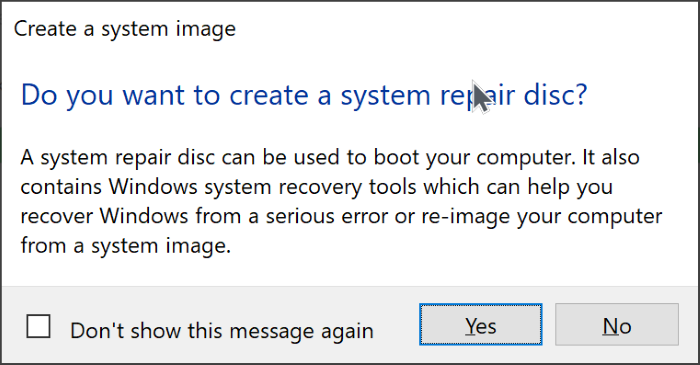
Once the image backup is ready, the tool will offer you an option to create a system repair disc. Click the No button. If you want to create one, refer to our how to create a system repair USB drive guide for directions.
Windows 10 has a built-in tool for the system image backup. Although the tool was not updated ever since it was introduced first with Windows 7 a decade ago, it’s part of Windows 10 and does its job very well. So, in this guide, we will see how to use the built-in image backup utility to create an image backup of Windows 10.
What is a system image backup? Well, in Microsoft’s own words, it’s a copy of drives required for Windows to run. It will include all partitions and files required to restore Windows 10.
Create Windows 10 system image backup
Step 1: Open the Control Panel. Change the View by to Small icons. Click on Backup and Restore (Windows 7). Yes, you need to click the Backup and Restore (Windows 7) option.
Step 2: On the left pane, click the Create a system image link to open the image backup wizard.
Step 3: Here, choose a location to save the system image backup. Remember that the tool won’t let you select a drive that is on the same physical disk that you are trying to back up. That is, the Windows 10 drive should not be on the same physical drive (HDD or SSD) that you are selecting to save the system image backup. If you have only one physical disk on your PC, connect a USB drive, and then select the same.
Make sure that your selected location has enough free space. The image backup will take about the current size of the Windows 10 install drive unless you want to include additional drives in the backup.
Click the Next button to continue.
Step 4: In this step, you need to select the drives that you would like to include in the image backup. Note that the tool automatically selects the drives that are required to run Windows 10 in the backup. So, you don’t need to worry about what drives to include in the backup. If you are creating a Windows 10 system image backup, no need to select additional drives other than the ones selected by default.
Here, the tool displays the amount of free space required to save the image backup of the selected drives. Make sure that the selected backup drive has the required amount of free space before proceeding further.
Click on the Next button.
Step 5: Finally, you will get the confirmation screen where you can see the backup settings, including the drives included in the backup. Click the Start backup button to begin creating and transferring the Windows 10 system image backup to the selected location.
Windows 10 will create a folder called WindowsImageBackup at the root of the selected drive and save the image backup (VHDX) over there.
Depending on the size of the data, the process might take up to a few hours. Don’t turn off your computer until the image backup is ready.
Once the image backup is ready, the tool will offer you an option to create a system repair disc. Click the No button. If you want to create one, refer to our how to create a system repair USB drive guide for directions.